Shoulder Arthroscopy
Indication
Anatomy
Considerations
Anaesthetic
An experienced shoulder anaesthetist helps.
Regional anaesthesia makes therapeutic shoulder arthroscopy possible as a day case.
If unable to get a clear view despite high fluid pressures on the Fluid Management System check with the anaesthetist the systolic blood pressure, maintain it as low as safely possible.
Equipment
The equipment and set up of the equipment is vital to making arthroscopic shoulder surgery easy and safe. Pay close attention to detail.
Standard arthroscopy stack with 30º arthroscope, 70º arthroscope rarely is needed.
Fluid management system pressure set as low as possible or as is needed to obtain a view (usual starting pressure 50mm Hg).
Use HIGH FLOW arthroscopy cannula's these have multiple small holes around the tip of the arthroscope and allow high flow of fluid.
Power shaver with varying blades (usually a 5.5 mm Stone cutting burr and a 5.5 soft tissue incisor)
Radiofrequency probe
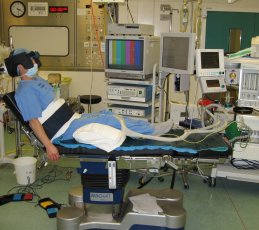
Positioning
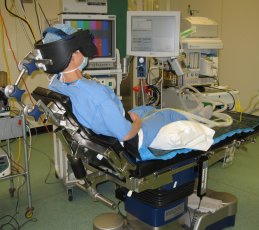
(Click on images for larger image)
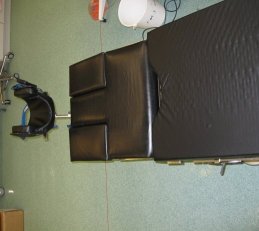 |
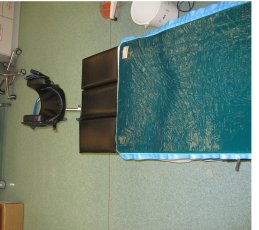
Maquet table with shoulder attachment and horseshoe head piece. Anaesthetic machine at foot end. |
 |
Place folded sheet across table before positioning patient, at level of join to table.
|
 |
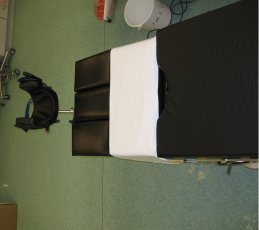
Place heating blanket and the gelpad over sheet. |
 |
Do not go higher than than the sheet/ join as when remove back shoulder piece it gets in the way. |
 |
Have head piece already attached to table, slide patient onto table. |
 |
Then patient slide up into head piece. |
 |
Fold sheet across chest incorporating non operated arm. |
 |
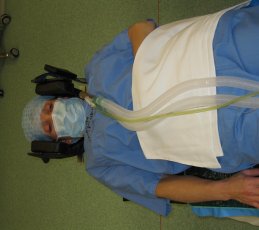
Enfold and secure ET tube with sheet from other side. |
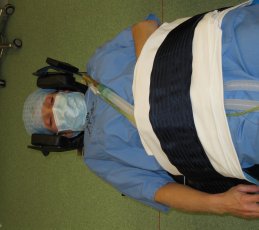 |
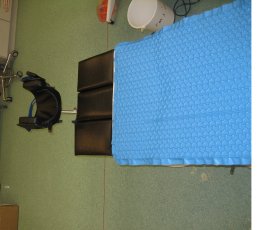
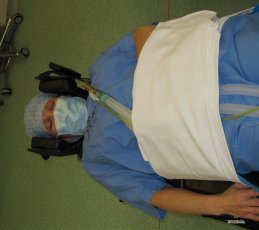
Secure patient to table by placing large blue strap over sheet. |
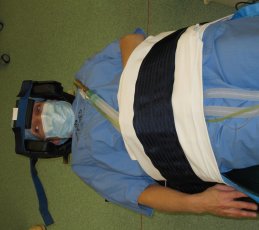 |
Place head straps, recheck and adjust once patient sat up. |
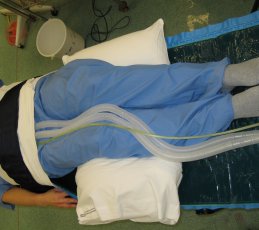 |
Place pillow under knees. |
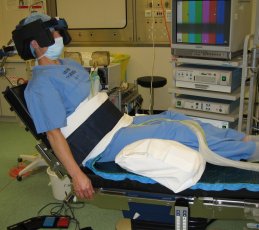 |
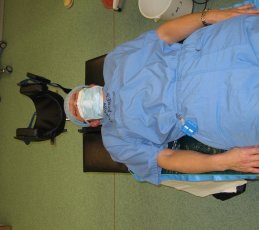
Sit patient up 45°. Watch head and neck while sitting up. Ensure patient does not slide down bed as sitting up. (Pillow and hold heels) |
 |
Check and adjust head and neck, secure head straps. |
|
|
Remove shoulder corner from operation side. |
Draping
Use
Stockingette for arm.
2 U drapes.
1 medium drape.
Plastic arthroscopy U drape.
Arm holder in middle.
Prep arm/ shoulder.
Place on stockingette go above elbow to prevent it slipping down.
Place 1 U drape from below.
Place 2nd U drape from above.
Cover legs with medium drape
Remove sticky from arthroscopy U drape and place up from below
Portals
Draw landmarks on shoulder.
Acromion, ACJ, lateral clavicle, coracoid, mark bicipital groove and mid lateral acromion.
Standard arthroscopy portals
Posterior portal
2cm below and 1 cm medial to lateral aspect of spine of scapula (soft spot).
Place an 18G spinal needle into the joint at the site of the posterior portal.
Use a short piece of connector tubing between the needle a 50 ml syringe, inject 50 mls of normal saline into glenohumeral joint. Disconnect the needle from the tubing, a jet of saline from the back of the needle confirms the intra articular position of the needle.
Inject 20 mls of saline with adrenaline into the sub acromial space from the lateral portal.
Anterior portal
Usually made as in to out portal after diagnostic glenohumeral arthroscopy, see below.
Glenohumeral arthroscopy
Insert trocar via posterior portal into the glenohumeral joint, feel for the groove between the humeral head and the glenoid, aim anteriorly just lateral to the coracoid.
You often feel a pop as it goes through the capsule return of saline previously injected helps confirm intra articular position.
Be systematic in your approach
Things to check.
-
Articular surfaces, glenoid and humeral head
-
Biceps anchor and anterior labrum (beware normal variants and Buford complex)
-
Biceps tendon, follow into tunnel (If pathological probe later from anterior portal)
-
Subscapularis and its insertion, including the biceps pulley
-
Supraspinatus insertion
-
Back of humeral head
-
Inferior recess
Proceed to further portals as needed based on pathology identified.
Anterior portal
With the arthroscope in the posterior portal identify the rotator interval and pass the arthroscope anteriorly just above subscapularis from inside out, keeping your exit point lateral to the coracoid. Insert a switching stick or the usual arthroscopy trocar and push through the capsule and subcutaneous tissue. Cut the skin over the trocar and insert a cannula over the scope and push it into the shoulder joint. Probe Biceps, labrum, anchor as needed from this anterior portal.
Bursoscopy (Subacromial bursa)
Remove the arthroscope from the joint, using the same posterior skin incision, place the arthroscope into the subacromial space by sliding it up under the acromion, feeling bone on the top of the trocar and the coracoclavicular anteriorly. Insert the spinal needle into the area planned for the lateral portal, mid way along the lateral border of the acromion and about 1-2 cm inferiorly (depending on how thick the subcutaneous tissue is). Triangulate and view the needle once a good position is found incise the skin and insert the blunt trocar, wave it around a little to open up the subacromial space.
Use a radiofrequency probe to excise the bursa and release the coracoacromial ligament if needed always working forwards to the anterior aspect of the acromion, feeling bone superiorly.
Closure
Post operatively
References